Setting up a Local Image Pack for Pardus
Posted by SparkleJun 15
 A typical hour of Pardus use can see you generate around 15 Mb of traffic. Most of this traffic is generated as you download images that are shown on the Navigation screen.
You could easily be downloading as much as 450 Mb every month… maybe more if you play in several universes!
Cutting down on the amount of traffic you are downloading will improve the overall responsiveness of Pardus, and if you have to pay for an expensive data plan – you might save enough for a Premium Pardus Account!
Attention! This guide has been tested and proven to work 100% properly using the Windows 7 and Mac OS X operating systems with Firefox 3.5x, Firefox 4.x and Firefox 5 browsers. No extra extensions or scripts are required to get Firefox to read local image pack files… just follow the steps.
I am going to install the Standard HQ Image Pack so that when I play Pardus using Firefox 4, it reads all the images directly from the local hard drive on my PC (most of you will be using Windows 7 but for those of you running Mac OS X you won’t be left out).
Step One – Download the Image Pack
 Log in to your Pardus account and open up the Settings section of your account. The link to manage your account is shown in the picture above, or you can just click this link to go there directly.
The fourth item on the page is called “Image pack”. You can choose from several Image packs for use online – and you can download them, too.
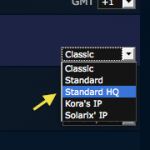
 Select the “Standard HQ” option from the drop down menu. The download link will then be made available for you.
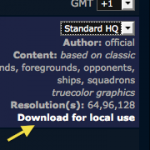
Click the “Download for local use” link and choose to save the file onto your computer (remember where you saved it!).
Just save the file for now – we will unzip it shortly.
Step Two – Tell Pardus you are going Local
 Find the section titled “Local or custom image pack” and choose “file://” from the drop down list. This makes Pardus change the HTML that it sends – allowing you to use local images.
The text field to the right will automatically be filled in with a this string: c:/pardus/images but this will need to be modified differently for Windows 7 and Mac OS X systems.

Windows 7 Users will need to add a / character to the beginning of the text, changing it to become /c:/pardus/images (yes, that forward slash is in the right location).
Mac OS X users should change the text to be based on the user who is logged in. My user name is jeff so I changed it to become /Users/jeff/Documents/pardus/images.
Scroll to the bottom of the page and click the “Save” link… and then confirm that the “Local or custom image pack” section is still filled out with the details you entered when it has saved.
Step Three – Unzipping the Image Pack
Next you need to create the physical folder structure that you configured in the previous step. This will be different for Windows 7 and Mac OS X systems.
Windows 7 Users will need to create a folder called pardus and place it at the root of the c: hard drive. Then inside that folder, create a second folder called images.
Mac OS X Users will need to create a folder called pardus and place it inside the “Documents” folder. Then create a folder called images and place it inside the “pardus” folder.
Finally, locate the Image Pack that you downloaded earlier and unzip the contents directly into the “pardus” folder. The “images” folder should now have 179 individual images and folders located directly in it (regardless of operating system).
Fixing Firefox 4 to work with Local Images
Firefox seems to have many problems showing local images within a browser when requested from an external website. This sequence of steps ought to resolve this for you without too much fuss. It requires adding 3 seperate settings for Firefox.
 Open a new tab in Firefox and type the following URL into the address bar about:config just like in the image. This brings up a warning screen to make sure you are aware of how careful you need to be here.
 Once you have clicked to continue, you will see a screen showing all the internal Firefox settings on display.
Preference 1
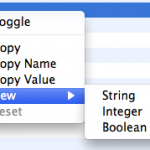
Right-click on some clear space on the window and you should have a popup menu appear (as in the image to the right). Select “New > String” from the popup and you will be be presented with a dialogue box asking you to “Enter the preference name”.
Paste the following as the preference name and click the “OK” button:
capability.policy.policynames
Another dialog box will appear asking you to enter the string value for the preference you just created. Paste the following the string value and then click the “OK” button to save the new preference:
localfilelinks
Preference 2
Repeat the earlier steps of right clicking and selecting “New > String” as before. Paste the following as the preference name, and then click “OK”:
capability.policy.localfilelinks.sites
Paste the following (very long string of URLs seperated by a single space each) as the string value and then click the “OK” button:
http://www.pardus.at http://forum.pardus.at http://chat.pardus.at http://orion.pardus.at http://artemis.pardus.at http://pegasus.pardus.at https://www.pardus.at https://forum.pardus.at https://chat.pardus.at https://orion.pardus.at https://artemis.pardus.at https://pegasus.pardus.at
Preference 3
Repeat the earlier steps and select “New > String” before pasting the following as the preference name (and then click “OK”):
capability.policy.localfilelinks.checkloaduri.enabled
Paste the following as the string value to use for this preference (before clicking “OK” to save it):
allAccess
Step Five – Restart that Browser
Finally you need to quite Firefox. Close all of it’s windows and make sure that it closes down completely. If you are uncertain, you can always restart your machine… that will force it to happen!
After restarting the browser, you should be able to visit Pardus and play as you always have. Only now all the images are being read locally off your hard drive – so it will mean snappier responses as well as less traffic as you play Pardus.
No comments