Features For New Pilots

Back in June 2012, some new features were introduced that benefited pilots who had played less than 1,000,000 APs. This was most likely implemented to allow new pilots to gain skills faster – reducing the number that decide to “give up” early in their career (at least this is my take on it).

The Pardus New Features forum thread describes these features:

The first and tenth kills of each NPC are rewarded with a bonus of 1 point in a skill depending on the killed NPC.

Reaching certain milestones (rank and competency advancements, 100/1000/… experience points) have a revitalizing effect – double AP regeneration for 24 hours.

System Messages

When you kill your first NPC of a particular type you will get a System Message similar to this:

Subject: Skill Bonus
Congratulations, you killed your first Space Clam! As a result of this new experience, you have gained one point in your Energy Collecting skill. There might still be more you could learn from fighting these vermin.

When you kill your tenth NPC of a particular type you will get a System Message similar to this:

Subject: Skill Bonus
Congratulations, you killed your tenth X-993 Battlecruiser! As a result of you becoming familiar with them, your Maneuver skill has increased further.

Note that the last System Message doesn’t mention that there might be more you could learn from continuing to fight them. You will not gain a skill bonus if you kill 100 of the same NPC (although you will achieve a ribbon that can show in your profile as a result).

Skill Bonus Gains

The list below shows the kind of skill gained when killing the 1st and 10th of each NPC (while you have less than 1,000,000 APs played):

Asteroid Mining
Locust Hives
Roidworm Hordes
Space Maggots
Space Snails
Space Worm Albinos
Cloaking
Escorted Smugglers
Experienced Pirates
Famous Pirates
Pirate Captain
Inexperienced Pirates
Lone Smugglers
Fuel Collecting
Bio Scavengers
Fuel Tankers
Space Locusts
Energy Collecting
Energy Locusts
Energy Minnows
Space Clams
Young Space Dragons
Gas Collecting
Gorefanglings
Nebula Locusts
Swarm of Gorefanglings
Hacking
Slave Traders
Combat Skills (randomly TA, HA, MA, WE, EN)
Ancient Crystals
Asp Hatchlings
Asp Mothers
Biks
Blood Amoebas
Blue Crystals
Ceylacennias
Cyborg Mantas
Developed Manifestations
Dreadscorps
Droseras
Elder Space Dragons
Energy Sparkers
Eulerians
Euryales
Euryale Swarmlings
Exocrabs
Frost Crystals
Glowprawns
Gorefangs
Ice Beasts
Infected Creatures
Lucidi Squads
Medusa
Medusa Swarmlings
Mutated Medusas
Mutated Space Maggots
Mutated Space Worms
Nebula Moles
Nebula Serpents
Oblivion Vortexs
Preywinders
Ripe Manifestations
Rive Crystal
Sarracenias
Shadows
Space Dragon Queens
Space Worms
Solar Banshee
Space Crystals
Starclaws
Sthenos
Stheno Swarmlings
Swarm of Energy Bees
Verdant Manifestations
Vyrex Assassin
Vyrex Hatcher
Vyrex Larva
Wormhole Monsters
Xhole Monsters
X-993 Battlecruisers
X-993 Motherships
X-993 Squads
Xalgucennias
Z15 Fighters
Z15 Repair Drones
Z15 Scouts
Z16 Fighters
Z16 Repair Drones
Z16 Spacepads

Interestingly, the Hidden Drug Stash does not give any gains at all!

Action Point Regeneration

System Message
The excitement from acquiring 1000 experience points has a revitalizing effect (your Action Points regeneration is doubled for the next 24 hours).

You will be granted double AP regeneration gains (that last for 24 hours – giving you 48 APs every 6 minutes) when you achieve the following milestones (while you have less than 1,000,000 APs):

Experience Points
100 exp
1,000 exp
10,000 exp
100,000 exp
1,000,000 exp
Compentency and Faction Ranks
Every time your competency increases (once per competency)
Every time your faction rank increases (once per rank)

These AP regeneration bonuses are not cumulative – if you increase rank and competency at the same time, you still only end up with double AP regeneration (which will wear off 24 hours after the last bonus you gained)

Is That All?

You may have noticed that the list of NPCs is far from complete at this stage. If you have recently killed your 1st or 10th of any of the NPCs below, please let me know what you gained and I will update this guide to include your discovery.

  • Feral Serpents
  • Lucidi Motherships
  • Lucidi Warships
  • Vyrex Mutant Mauler

Many of the NPCs listed above are likely impossible to kill for inexperienced pilots – do not attempt them unless you have assistance (and loads of luck)!

The Rules Of Dominance

Handweapons factoryWhether you love it or loathe it – the introduction of Alliance Territory, and with it the concept of Dominance, has changed the way that we all play Pardus.

Amongst other things, the Pardus Manual identifies requirements to achieve Dominance over a sector by gaining Influence points and explains that …

… This influence is calculated once a day for every sector and alliance … At least 30 Influence points are necessary to attain Dominance over a sector …

This leads to the obvious questions that sector managers across the universe have asked (behind closed doors).

When are the Influence points calculated? When precisely is the Dominance for a sector determined?

Until now, the details have been kept closely guarded and taken advantage of by only a few. What follows is information that the developers themselves would probably prefer you weren’t aware of!

The rules of dominance

  1. Only buildings that tick at 1925GMT will contribute to Influence points
  2. At 0000GMT, the sector groups those buildings by Alliance affilliation and sums their current Influence points. If the sum is greater than or equal to 30, then…
  3. The Alliance with the most points gets Dominance. If two Alliances tie, nobody gets Dominance

It may be worth noting that you can upgrade a building between the 1925GMT Building tick and the 0000GMT Diversity tick. The current level of the building at 0000GMT becomes the number of Influence points allocated for that building.

How To Combine Stim and Drug Use

Stim Chip Mill
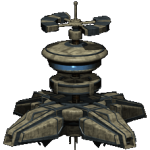
In Pardus, both drugs and stim chips (all varieties) give additional action points – and as covered in the article on Stims and their various uses, coloured stim chips offer skilling, movement and trade benefits as well.

Whilst you are under the effects of either drugs or stim chips, consuming the other yields no benefit, preventing the combination of coloured stim chips and drugs.

In reality it is actually possible to combine the effects of coloured stims and drugs!

How Drugs And Stims Work…

Both drugs and stim chips have a limit on the number that can be consumed with any benefit, designed to cap the amount of action points you can obtain in one go. Without advanced skills, for both drugs and stim chips this number is 25 tonnes per 25 hours. With advanced skills, the number of drugs that can be consumed is 30 tonnes per 30 hours.

It used to be believed this quota was timer-based, with one tonne of your quota decaying each hour after you took the initial drug or stim chip.

If you were to take 10 tonnes of drugs at 08:33, your drug level would reduce by one at 33 minutes past each hour, until it got to 18:33 when you would no longer be under any effects of drugging.

Recent developments have discovered the decay of drug and stim chip levels is not timer-based, but is instead tick-based!

It has been observed that the decay in drug and regular stim chip levels happens at 59m03s past each hour in Artemis and at 29m03s past each hour in Orion (and Pegasus). The decay in coloured stim chip levels happens at 29m03s and 59m03s past each hour (across all universes).

Orion & Pegasus:
If you were to take 1t of drugs at 08:26:00, at 08:29:03 you would be considered undrugged again.

Artemis:
If you were to take 1t of drugs at 08:56:00, at 08:59:03 you would be considered undrugged again.

Crucially, the decaying of the effects of coloured stims is still timer-based (lasting 15 minutes from the point of taking them). This opens up the possibility (with careful timing) to leverage both coloured stims and drugs at the same time.

If you were to take 1t of a coloured stim chip at 28m or 58m past the hour, after one minute and three seconds (when the time becomes 29m03s or 59m03s past the hour respectively) the game would no longer consider you to be stimmed up and would allow you to consume drugs without issue. However, the effect of the coloured stim would remain for a further 14 minutes, whilst you are still able to consume drugs.

Here is a handy summary to show exactly how you should plan your combined stim and drug use…

Skilling guide:

  • Take 1t of crimson stims at 28m or 58m past the hour
  • Skill away
  • Take drugs after 29m03s or 59m03s past the hour (depending on universe)
  • Continue to skill away under the effects of the crimson stim

Moving guide:

  • Take 1t of amber stims at 28m or 58m past the hour
  • Do your thing
  • Take drugs after 29m03s or 59m03s past the hour (depending on universe)
  • Continue to move at a reduced AP rate under the effects of the amber stim

Trading guide:

  • Take 1t of capri stims at 28m or 58m past the hour
  • Trade away
  • Take drugs after 29m03s or 59m03s past the hour (depending on universe)
  • Continue to trade at a reduced AP rate under the effects of the capri stim

A big thank you to Tro who took the time to bring all this together into a handy guide.

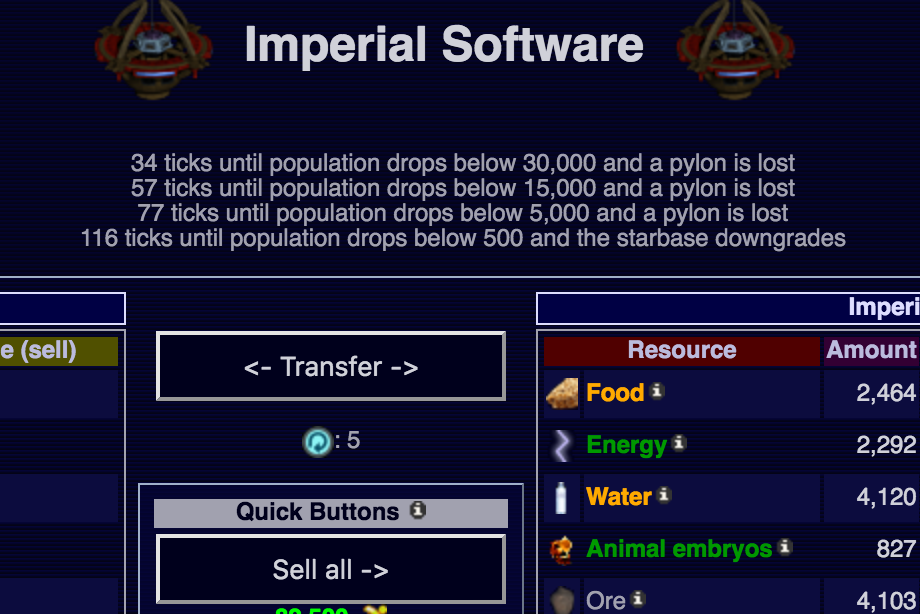
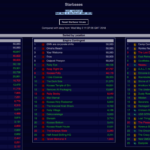
When you visit the Pardus Cluster Statistics page, you are presented with a breakdown of Starbases and their population in the PFC, PEC and PUC. This information is really useful for economy managers to keep an eye on starbases that dropping in population (and subsequently need some attention).
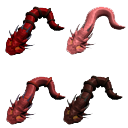
This script allows you to take a “snapshot” of the Starbase population data and then, when you visit the page again later, see which starbases are dropping, increasing or staying the same population. Apart from the obvious colouring of the Starbases, you can hover over each to get information about previous population values.

The Feral Serpent

To celebrate Pardus’s 12th birthday in Sept 2016, an update to the Feral Serpent was introduced to the universe. The most obvious addition was the Feral Egg… but no further information was available as to what to do with these eggs.

A rare new commodity – the Feral Egg – is now available. Although feral eggs already command a high price on the black market, their use is yet unknown.

Furthermore we have the following tidbits:

  • Feral Serpents behave differently depending on their maturity – this is now visually apparent.
  • Based on their maturity, they may drop one or more feral eggs on death.
  • The mobility of Feral Serpents in general has been improved.

The details unravelled…

You can Explore the Den at Nhandu [23,26] for eggs. A Feral Egg spawns at the Feral Den just after server reset (0530 GMT) and can be harvested at the Den by clicking the Explore the Den link at Nhandu [23,26].

We are also told that the Feral Serpent drops Feral Eggs when he is killed (a different amount depending on what stage you kill him at). These Feral Eggs are used to purchase special new equipment from the Feral Serpent Outpost.

Feral Serpent Outpost

When you kill the Feral Serpent, a wormhole opens up at the coordinates you killed him – to a completely isolated part of the Pardus sector that contains the new Serpent Outpost.

The wormhole can remain open for up to an hour – but typically closes after about 20 minutes.

When you travel through the wormhole you can enter the special building (the Serpent Outpost) at Pardus [94,32] where you are able to exchange Feral Eggs for various ship equipment and upgrades.

  • Feral Spin Aparatus (Drive) – 19 Feral Eggs
  • Feral-Lucidi Crossover Cannon (Laser) – 13 Feral Eggs
  • Feral Scales (Equipment) – 9 Feral Eggs

All these items are sensitive requiring a Repair Drone to maintain them.

How To Destroy A Starbase

Imperial Player Owned StarbaseIf you are currently commanding a Starbase, then you are probably aware that you can initiate a self-destruct to destroy your Starbase. This is not something you would do regularly!

This guide looks at how you would go about destroying an undefended Starbase belonging to someone else.

It is possible to assault and destroy a Starbase successfully using pilots – usually for Starbases with minimal (or no) defenses. In reality it is much more common to use Squadrons for this task – especially since it can all be undertaken by one pilot.

Bomber or Fighter Squadrons?

For this task you need to hire Bomber Squadrons. Ultimately this is because they have better armor and are able to take more damage without being destroyed.

How Many Bomber Squadrons Are Needed?

This is based on how many Heavy Defense Modules are present on the Starbase you are attacking. Assuming the Starbase is undefended, the following gives you an idea of how many Squadrons you should require.

HDAs on Starbase Bomber Squadrons Required
0 – 3 5 Squadrons
4 – 5 6 Squadrons
6 – 7 8 Squadrons
8 – 9 10 Squadrons
10 – 11 13 Squadrons
12 – 13 15 Squadrons
14 – 15 17 Squadrons
16 18 Squadrons

You will need to hire Bomber Squadrons and get them to the target Starbase without arousing the suspicion of, well, anyone. The amount of APs available to a Squadron at any one time means you will probably need to move and rest your Squadrons several times (sometimes over many days) until they reach the target Starbase.

The ultimate goal is to destroy a Habitat Ring (this consists of 100 building points) and then move into the Command Center before destroying that as well (this consists of a further 300 building points).

You need to ensure your Squadrons have enough APs to do 400 building points of damage before you initiate your attack.

First — Take Out A Habitat Ring

To begin with, move all the Bomber Squadrons on top of the same Habitat Ring (there are 8 to choose from) and click the Attack this building link with one of the Squads.

As well as shooting an array of LV-111 missiles at a single Starbase defense module (chosen randomly each attack), your Bomber Squadron will do building damage based on the number of ships in the Squadron.

Ships in Squadron Building Damage per Attack
100 ships 8 points damage
99 thru 75 ships 6 points damage
74 thru 50 ships 4 points damage
49 thru 25 ships 2 points damage
24 thru 1 ships no damage

The first attack you do with a full 100 ship Bomber Squadron will take 8 points off the Habitat Ring (although due to the mechanics of how damage is resolved, this may end up being 6 points). Once you have attacked once, switch to another 100 ship Bomber Squadron and repeat until all squadrons are now less than 100 ships.

Continue the attack, using the Bomber Squadron with the most ships every time. This will likely see you switching browser tabs a lot and requires some concentration. While the number of ships in each attacking Squardon is above 75, each attack will be taking 6 points off the Habitat Ring.

After about 18 attacks you should have destroyed the Habitat Ring. This will trigger a GNN entry – so be quick to move all your Squadrons to the Command Centre.

Next — Take Out The Command Centre

Move all your Bomber Squadrons to the Command Centre and continue the attack, using the Bomber Squadron with the most ships every time. Remember that you need to deal a total of 300 points of building damage to destroy the Command Centre.

Once you have destroyed the Command Center, the Starbase disappears (and there is a further GNN entry). Job done!

Real example — Against a 6x HDA Starbase using 9 bombers (and with no defence) will require about 90 rounds before the Starbase is destroyed (this ought to leave all 9x Squadrons between 65 and 55 ships each)

When under the influence of a Capri Stim the navigation screen screen is covered with the level of resources on each tile. This can be more than a little distracting.

This userscript hides the text that is shown on each tile (returning your navigation screen to normal). The effects of a Capri Stim are still in effect (reduced cost of trading) and you can obviously turn off the userscript if you want to view the resource levels for some reason.

Stims And Their Various Uses

Stim Chip MillFor a long time we have had Stim Chips, a legal alternative to Drugs (and a topic we discussed as Pardus Stim Chip Facts in the past).

An update to the Stim Chip Mill was announced in August 2015 where we saw the introduction of three new types of Stim Chips, each with their own special effect.

When using one of these Stims, just take one at a time (and make sure you are not under the effects of regular drugs – find out how to combine stim and drug usage). Each Stim lasts for 15 minutes and will give you the same AP gain as a regular Stim Chip, in addition to the following effects…

Crimson Stim

Crimson Stim ChipIt has been observed that combat pilots show very quick learning abilities when taking Crimson Stim immediately before battle.

The Crimson Stim doubles the rate of skill gain for Tactics, Hit Accuracy and Maneuver (up to a skill level of 65). This makes it an absolute must-have for pilots grinding out ASP or just skilling.

You can tell you are under the effect of a Crimson Stim because it says so on the NPC combat screen.

Capri Stim

Capri Stim ChipIt appears to give its user a heightened sensitivity of surrounding space. It is also reported to increase focus, especially when trading or harvesting.

The Capri Stim decreases AP cost for trading by 3 and for harvesting by 5. It also shows the resource levels on all fields on the main Nav screen (so you know if you are under the effect of a Capri Stim by this very visual change to the main Nav screen alone).

For a trader with a Class I Teleporter installed (which reduces the cost of trading to 5 AP) this means they can do a trade for just 2 AP! If you have a lot of buildings close together in your economy, then this is the choice for you!

Amber Stim

Amber Stim ChipUsers report that time seems to slow down when navigating under the influence of Amber Stim.

The Amber Stim decreases AP cost for movement by 1 across all field types. This is ideal if you need to travel any great distance, combined with the recent ability to Pack Goods, this seems ideal for hauling goods long distance.

You can tell you are under the effect of a Amber Stim because there is a small amber “-1” beside the movement cost icon in the Status section of the main Nav screen.

Releasing The Feral Serpent

Feral Serpent
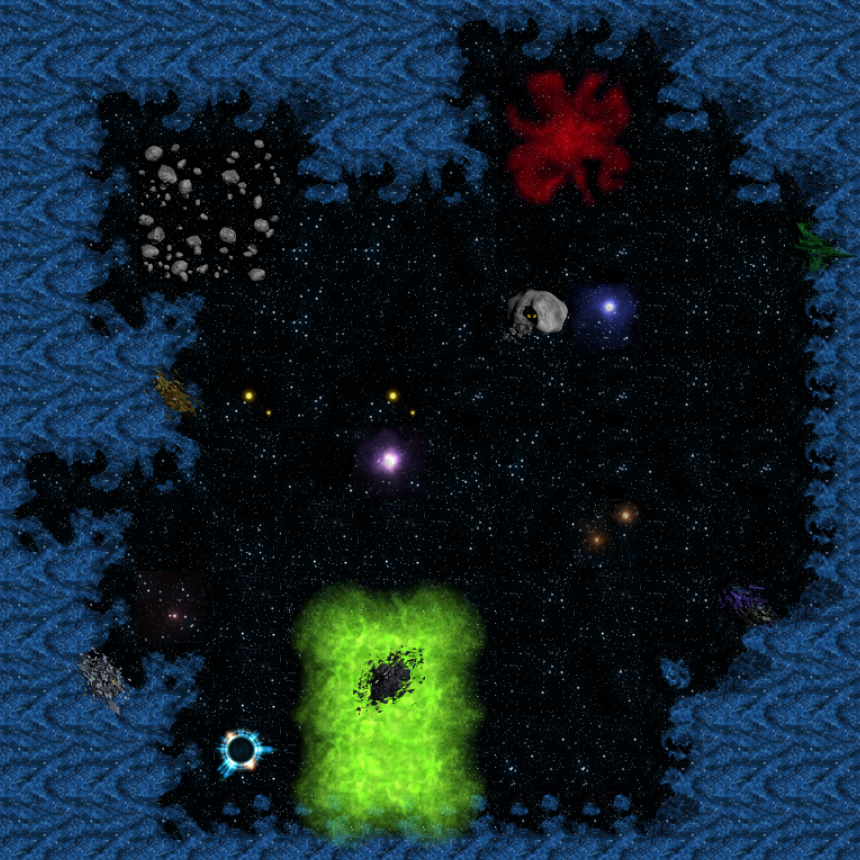
The Feral Serpent has the highest threat rating for an NPC. It wanders the universe (in some cases very quickly), teleports through Wormholes and across MO lines, and aggressivley targets pilots as it romps around on a killing spree.

Check out the Feral Serpent details at Blacksun’s Pardus Resources for vital statistics on this NPC.

Unlike most NPCs, the Feral Serpent doesn’t spawn in the same place. Under the section on NPC Spawning, the Pardus Manual mentions that the Feral Serpent uses Triggered Spawning.

How Do You Trigger The Feral Serpent?

Serpent DenAccording to the Pardus Manual, the Feral Serpent is spawned by searching the Serpent Den from time to time.

First you need to visit the Serpent Den in Nhandu [23,26].

Once there, choose to Explore the Den via from the Commands panel in the navigation screen.

Explore The Den

Upon exploring the den, one of two message will show in the message frame of the main screen.

If the Feral Serpent is not already loose in the universe – and he died at least 7 days previous, you will be successful in releasing the Feral Serpent and will see:

You catch a glimpse of something quickly fleeing the den!

Otherwise you are not successful and you will see:

The den appears to be uninhabited at this time.

Pardus Paint Preview ScreenshotThis userscript allows you (and only you) to preview the different paints that are possible for your current ship as you fly around in the navigation screen.

Useful when deciding what paint you are going to purchase from a paint shop.

NPCs showing Exp valuesThis userscript overlays the experience you would get for killing an NPC displayed directly on your navigation screen.

Useful when completing VIP Adventure Missions and when you are just shooting NPCs for fun.